
 In Eclipse Che, stacks are runtime configurations for workspaces. Eclipse Che 5.0 provides the ability to quickly create a new stack based on an existing Docker image. There are a few requirements, with the main one being that the image must include a bash shell (fortunately most already do). Additionally, Docker images used with Che must have a non-terminating
 CMD command so that the container doesn’t shut down immediately after loading. However, we can do this in Che without having to modify the Docker image.
This article outlines how you can create a new stack based on the docker/whalesay image, the Docker image many folks would have come across when going through the Docker tutorial.
Step 1: Create a new Runtime Stack
- Install and launch Eclipse Che. (This article is based on 5.3.1)
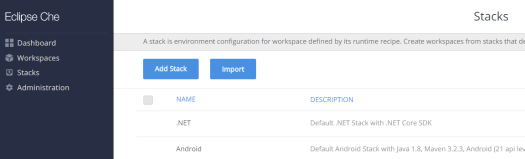
- In the left-hand menu, click on ‘Stacks’ then ‘Add Stack’
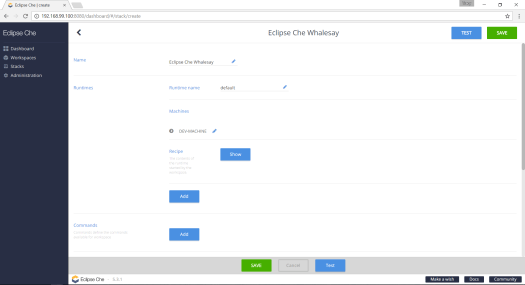
- In the new stack page, fill in the ‘Name’ field e.g. Eclipse Che Whalesay
- For good measure, in the Tags section, delete the Java 1.8 tag and you can add in any preferred tags (press Enter after each tag to turn it blue).
From now your stack is available on the dashboard or stack list, but it doesn’t yet do anything impressive.
Step 2: Reference the Docker Image
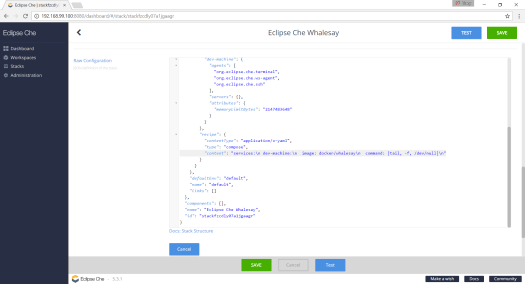
- To reference the Docker image, in the stack editor, first scroll down to the ‘Raw Configuration’ section and click ‘Show’. Find where it says ‘image’ and replace the existing entry with the docker/whalesay one. Click ‘Save’.

- As the whalesay image normally shuts down after running, we need to make it so it keeps running. We can do this using Docker Compose syntax that is now supported in the stack editor. To do this we add the following command to the content.
command: [tail, -f, /dev/null]
Whitespace matters so check the recipe preview in the ‘Runtimes’ section to ensure it looks like correctly formatted Docker Compose syntax. Although this is a bit hacky, it is great because it means we can reuse the docker image completely unchanged.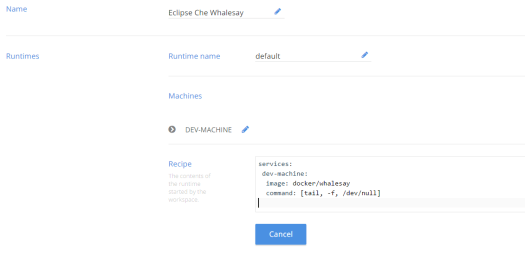
Step 3: Add a Custom Command
Next we will create a command to allow us easily run the whalesay image within the browser IDE.
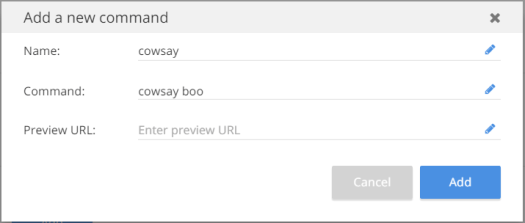
- In the Commands section, click Add. Fill in the name and command fields. In this case we’ll simply make the command just say ‘boo’.
- Name: cowsay
- Command: cowsay boo
Step 4: Test the Stack
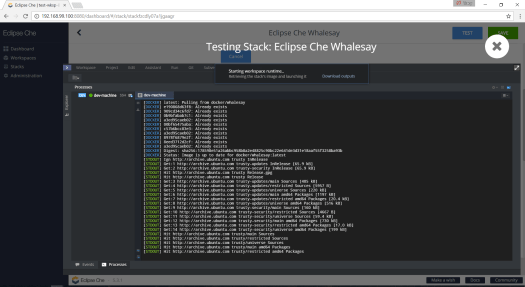
- That’s it, now we can test it straightaway by clicking on the ‘Test’ button. A dialog will pop-up, click ‘Test Workspace’, no need to import any projects.
- This should pull the whalesay image and launch up a workspace with it configured.
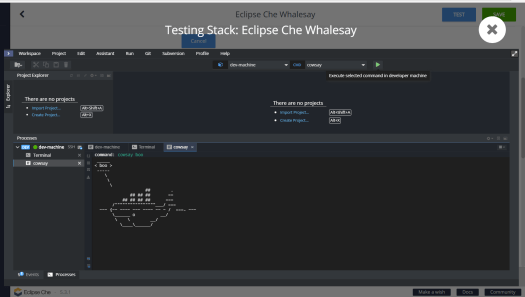
- Click on the play icon next to the cowsay command and you should whalesay in the terminal saying boo!
Bonus Step: Use Macros
- We can also use macros in commands, try editing the command to have the whale say the name of the selected file like this:
- Name: cowsay
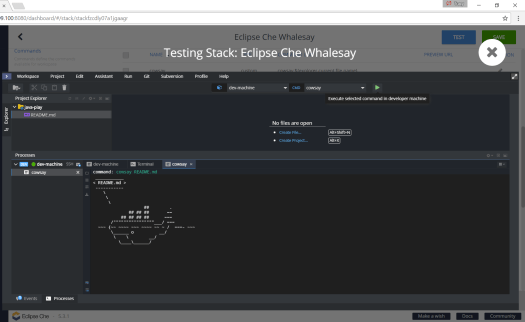
- Command: cowsay ${explorer.current.file.name}
A full list of macros can be found here: https://www.eclipse.org/che/docs/ide/commands/#macros
- Then test the workspace again, this time including one or two example projects. Click on a file, then run the command. This time whalesay should say the name of any selected files.
And that’s it, an unchanged Docker image easily integrated into a new runtime stack!

Nice bllog thanks for posting